Text
Create, edit, fit, bend, shape, and convert text for laser projects.
The Text tool creates editable text objects. Text stays editable while you change its font, spacing, box size, or advanced shape. Convert it to a path only when you need to edit the letter outlines as vector nodes.
Activate
- Hotkey:
Ctrl+T - Toolbar: Text in the Creation Toolbar
Create text
Point text
Point text grows horizontally as you type.
- Select Text.
- In Properties > Text Type, choose Point.
- Click the canvas and type.
- Click outside the editor or press
Escto commit.
Box text
Box text wraps within a fixed width and is useful for signs, labels, and paragraphs.
- Select Text.
- In Properties > Text Type, choose Box.
- Drag on the canvas to set the box width, then type.
- Change Box Width later in Properties. Enable Squeeze to Fit to compress the text horizontally instead of wrapping it.
If you commit a new text object without typing anything, Beam Bench removes the empty object.
Edit existing text
Select a text object to open its controls in Properties. Click Edit on canvas, or double-click the text, to place the caret and edit in context. Arrow keys, Home, End, and text selection work normally. Click outside or press Esc to commit.
Locked text cannot be edited until it is unlocked.
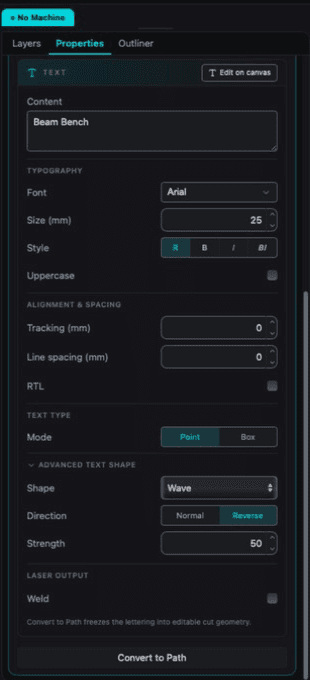 Text controls live in the Properties panel. The available advanced controls change with the selected shape.
Properties
Typography
| Option | What it does |
|---|---|
| Font | Chooses a system or bundled font. |
| Size | Sets the text height in the current display unit. |
| Style | Selects Regular, Bold, Italic, or Bold Italic. |
| Uppercase | Displays the content in uppercase without replacing what you typed. |
Alignment and spacing
| Option | What it does |
|---|---|
| Align / V Align | Positions straight text relative to its insertion point or box. These controls are hidden for shaped text. |
| Tracking | Adds or removes space between characters. |
| Line Spacing | Changes the distance between lines. It is unavailable for Bend, Path, Arch, and Circle layouts. |
| RTL | Lays characters out right-to-left for right-to-left writing systems. This is independent of the advanced shape's Direction setting. |
Advanced text shapes
Expand Advanced Text Shape and choose a value from Shape. Changes preview immediately on the canvas.
| Shape | Result | Additional controls |
|---|---|---|
| Straight | Normal editable text with no shaped baseline or envelope. | Alignment controls |
| Bend | Places text on a circular arc. | Bend Radius, Baseline Offset, Direction, Distort |
| Path | Places text along a vector guide selected from the canvas. | Select/Pick/Clear Path, Baseline Offset, Distort |
| Arch | Curves the outer text envelope into an arch. | Direction, Strength, Distort |
| Rise | Slopes the text upward or downward across its width. | Direction, Strength |
| Wave | Expands and contracts the text through a wave-shaped envelope. | Direction, Strength |
| Flag | Moves the text baseline in a flag-like wave. | Direction, Strength |
| Angle | Creates an angled, tapered envelope. | Direction, Strength |
| Circle | Places text around part of a circle. | Arc Span, Circle Position, Circle Side, Distort |
Direction and strength
For Bend, Arch, Rise, Wave, Flag, and Angle:
- Normal applies the shape in its default direction.
- Reverse applies the same shape in the opposite direction. It does not reverse the character order; use RTL when the writing direction itself should be right-to-left.
- Strength controls how strongly Arch, Rise, Wave, Flag, and Angle deform the text.
Bend and baseline offset
- Bend Radius controls the size of the arc. A larger radius produces a gentler bend.
- Baseline Offset moves Bend or Path text perpendicular to its baseline without changing the guide.
- Distort reshapes the letter outlines to follow the curve. Turn it off to keep each letter more rigid while its position and angle follow the curve.
Circle placement
Circle text has two independent placement choices:
- Circle Position: Top / Bottom selects the upper or lower part of the circle.
- Circle Side: Outside / Inside places the letters outside the circle or toward its center.
- Arc Span sets how much of the circle the text occupies, from 45° to 315°.
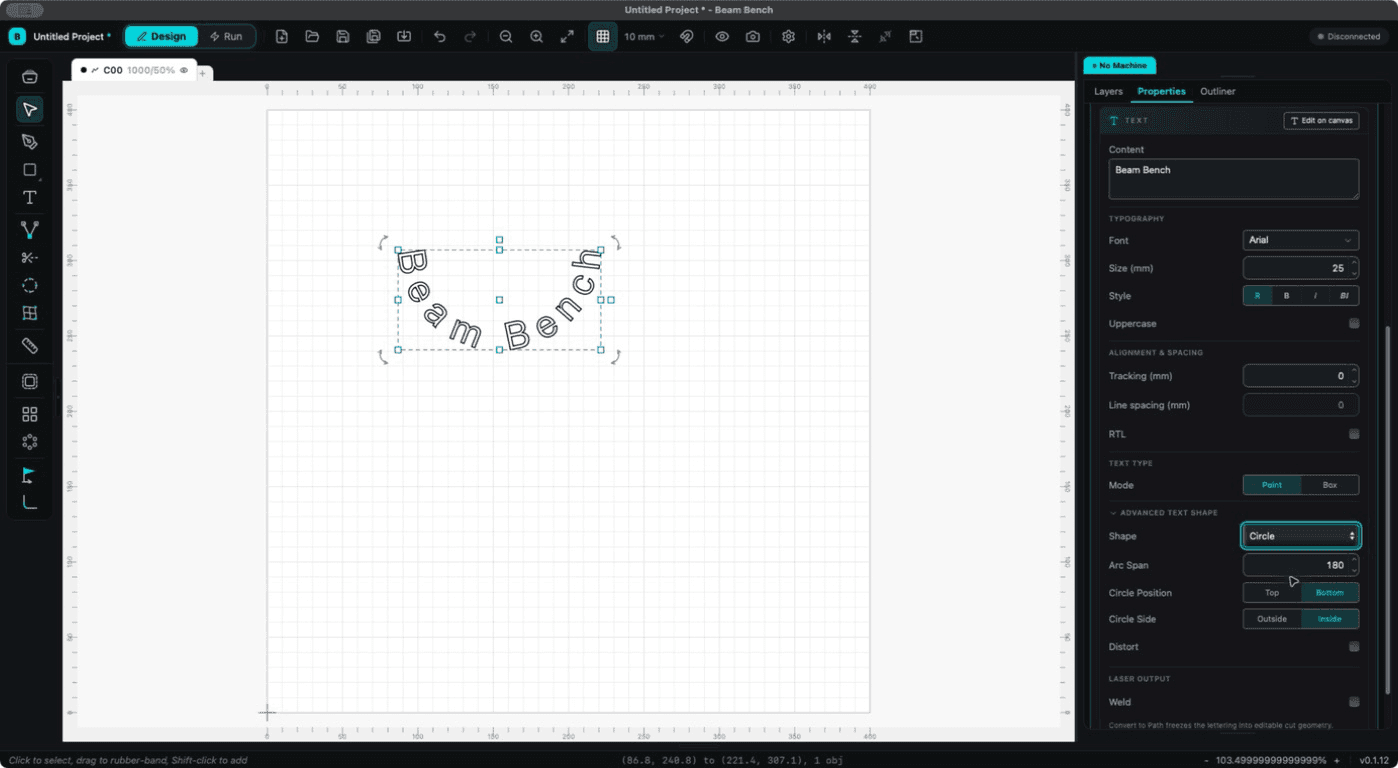 Bottom and Inside are independent settings: this example puts the lettering on the lower part of the circle and faces it toward the center.
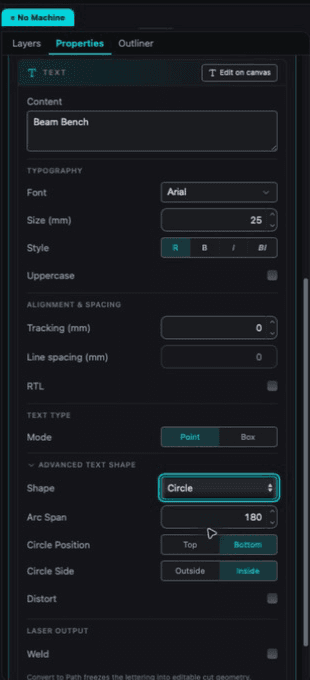 Circle exposes placement controls instead of Direction and Strength.
Text on a path
- Create or select a text object.
- Choose Path under Advanced Text Shape.
- Click Select Path, then click a vector or shape on the canvas. Press
Escto cancel the picker. - Use Pick to choose a different guide, Clear to unlink it, and Baseline Offset to move the text away from the guide.
The guide remains a normal project object and can still output. Put a construction guide on a tool layer or disable its layer's Output before running the job.
Weld and Convert to Path
These commands solve different problems:
- Weld merges overlapping letter outlines for laser output while keeping the object editable as text. Use it for script fonts or tightly overlapping letters that should become one continuous cut shape.
- Convert to Path permanently freezes the current lettering and shape into editable vector geometry. After conversion you can use the Node tool, Boolean operations, and other vector tools, but you can no longer edit the wording, font, or text-shape settings.
Save a copy of the editable text before converting if you may need to change the wording later.
Related
- Properties panel: object transforms and shared properties
- Node tool: edit converted letter outlines
- Layer settings: control output, power, speed, and passes